On a couple of occasions I’ve talked about wood gasification as both a heat source and for electrical power generation (here and here).
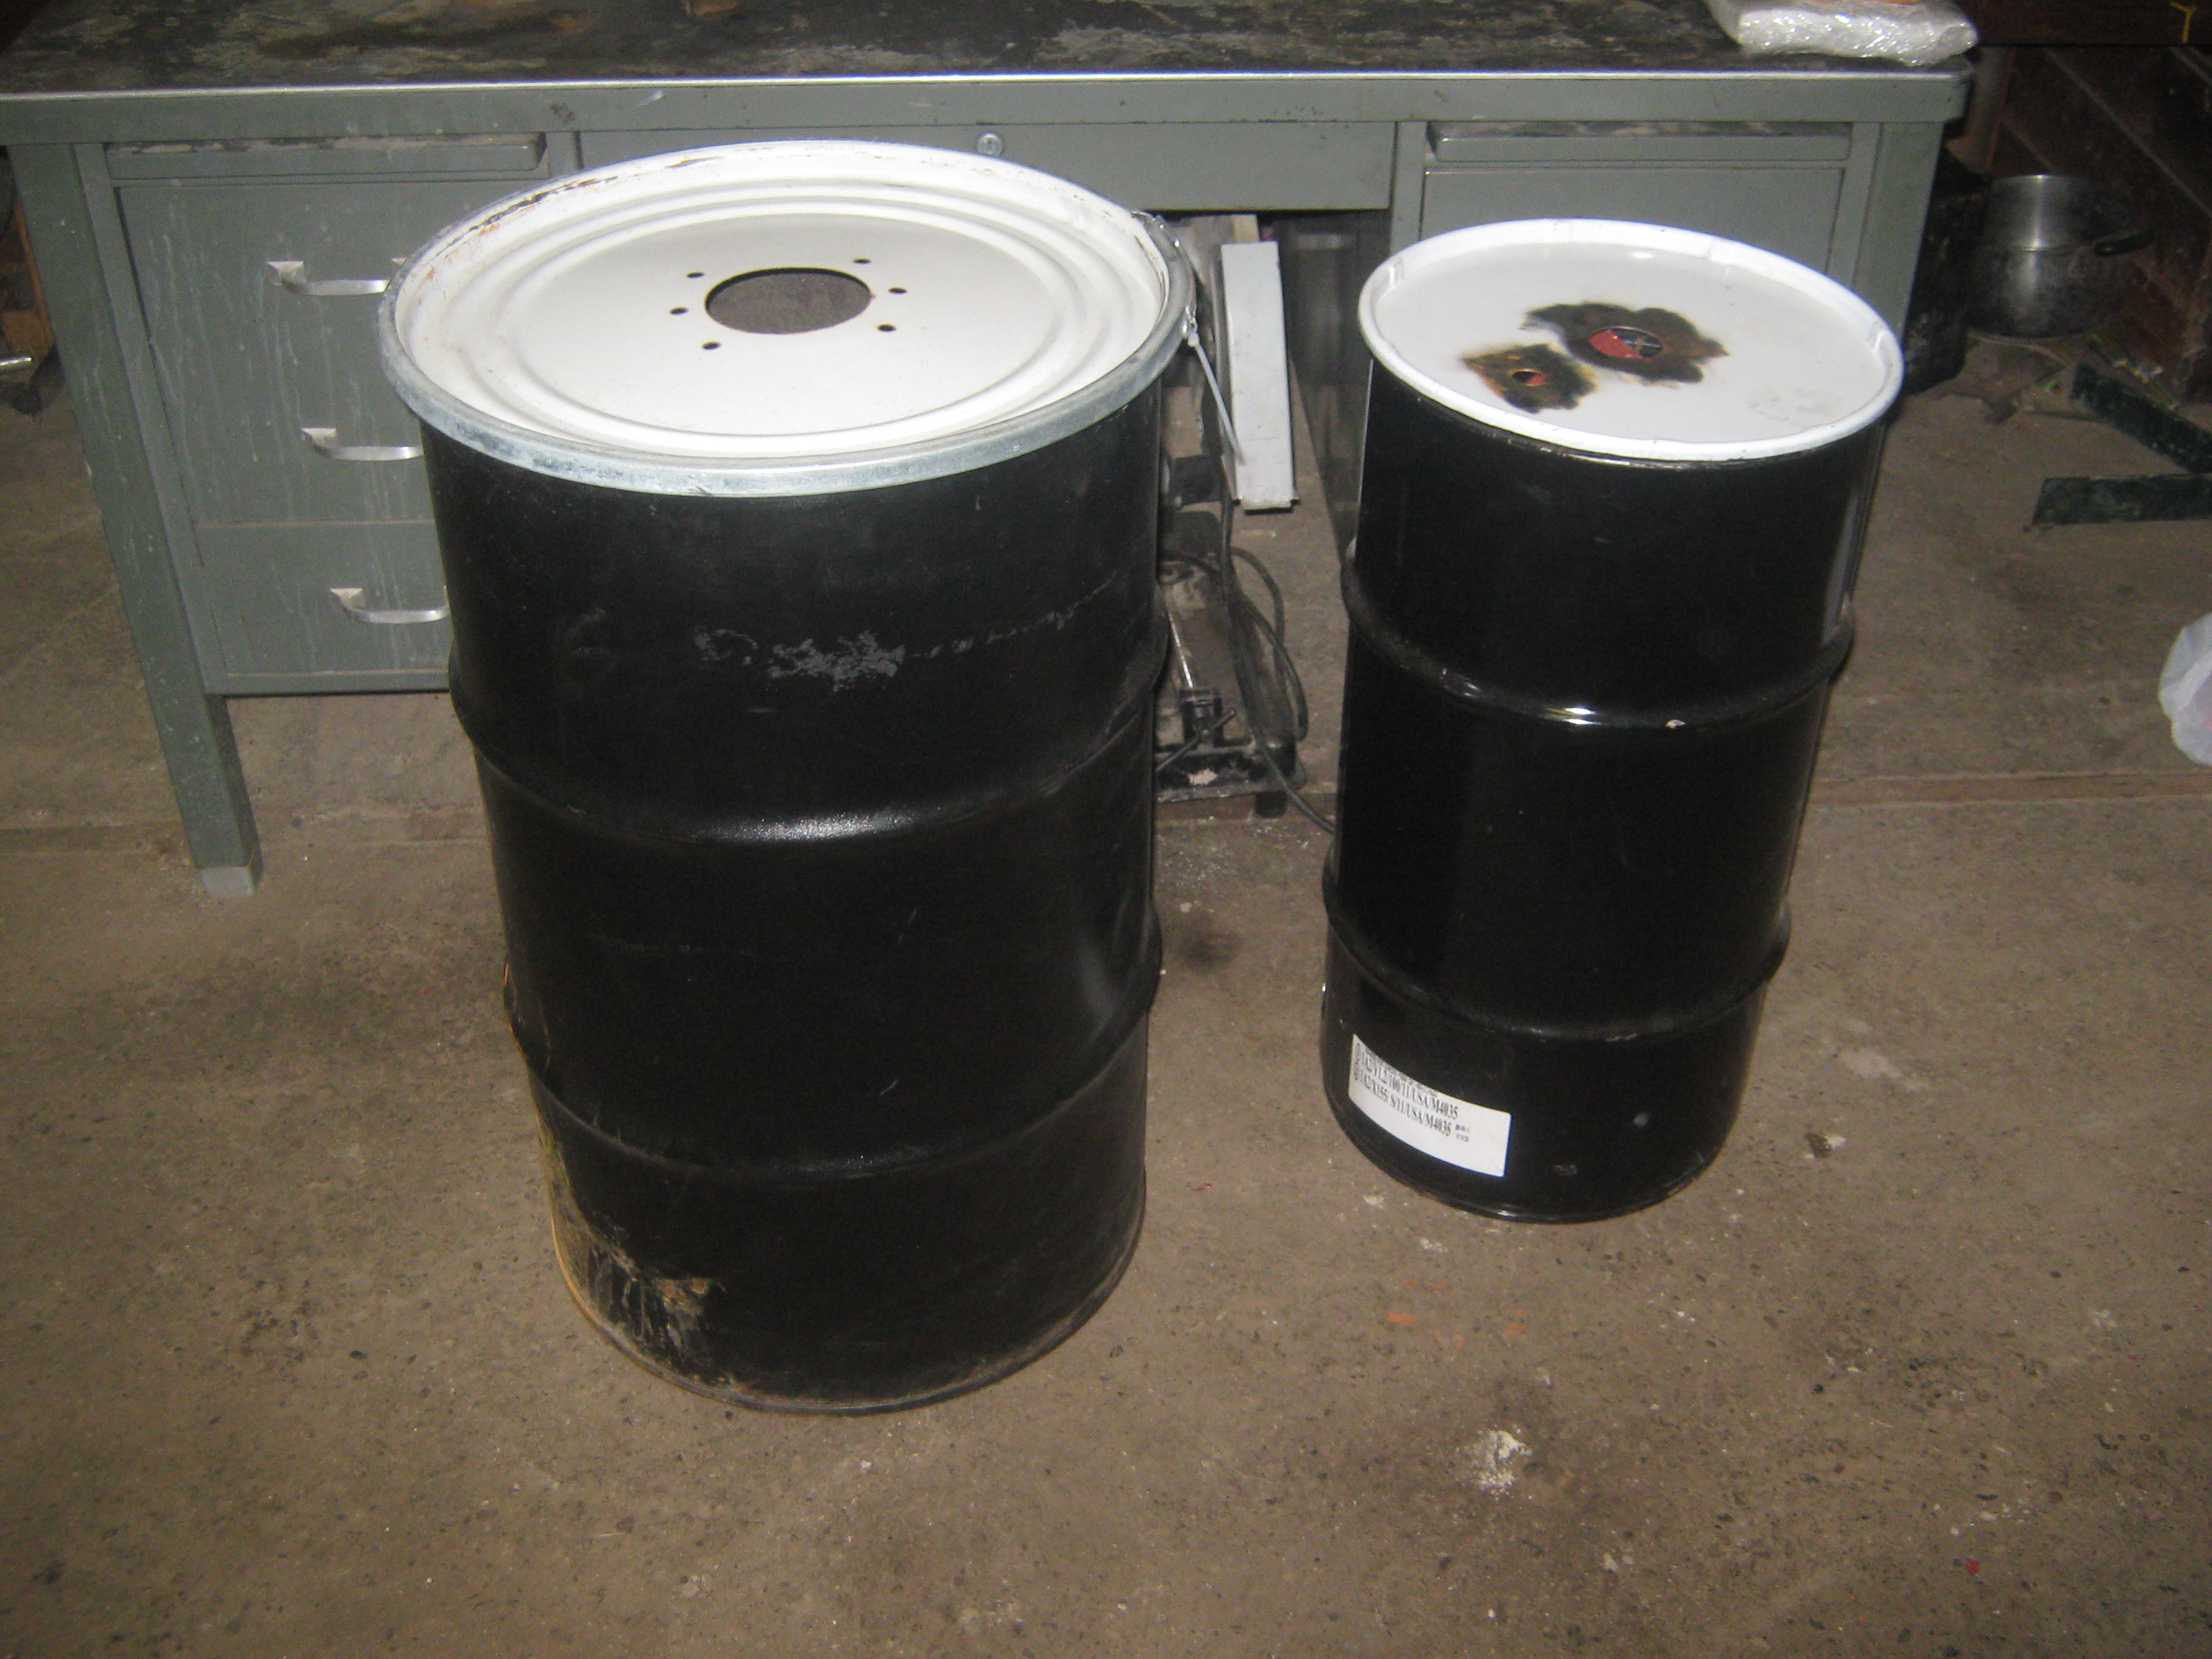
On our recent road trip across North America I finally took action and purchased a GEK III (a kit of steel parts and accessories) as the basis for our wood gasifier. I bought the kit from All Power Labs in Berkley, California on our way back home, and we hauled two steel barrels of parts (a 30 gallon drum strapped to the back of the van and a 16 gallon drum buried in the back) for the rest of the trip.We were concerned about crossing the border with the kit; we declared it as a wood gasifier and were sent on our way with no problems or additional paper work. We did some research on the possible duty before we crossed and had concluded that the kit was duty free … nice to have that confirmed at the border!
 Once we got the kit home the two drums of parts sat in the corner of the shop for over a month. A few days ago I finally unpacked the two barrels … there are a lot of parts! I purchased a GEK III V4.3, the most recent version that All Power Labs is building. The fabrication/assembly instructions for these kits are on the internet. As I unpacked I compared the parts in the barrel with a video from All Power Labs; the parts in the smaller barrel matched what was shown in the video, but the steel parts in the larger barrel were different in a few cases … right now I am assuming that some changes to the parts have been made since the video was made.
After some emails with Julia Hasty (a technical specialist at All Power Labs), these are the instructions I am using for my project:
- The assembly instructions are at http://wiki.gekgasifier.com/w/page/27905807/Assembly%20Instructions%20for%20the%20GEK%20v4%20Kit,
- I read the above assembly instructions first to get an idea of the assembly steps (paying attention to the callouts for the v4.3 unit),
- I wound up on the following page for welding instructions for the GEK III … http://wiki.gekgasifier.com/w/page/24033107/GEK-Fabrication-Instructions
- The most recent instruction set is for V4.2
- I am assuming the page http://wiki.gekgasifier.com/w/page/45228987/GEK%20v4_2%20Fabrication%20Instruction (version 4.2) is a set of updates for the version 3.5 fabrication instructions.
- I plan to follow the 3.5 welding instructions with modifications from the 4.2 set,
- I am also following the fabrication videos provided at the above fabrication link.
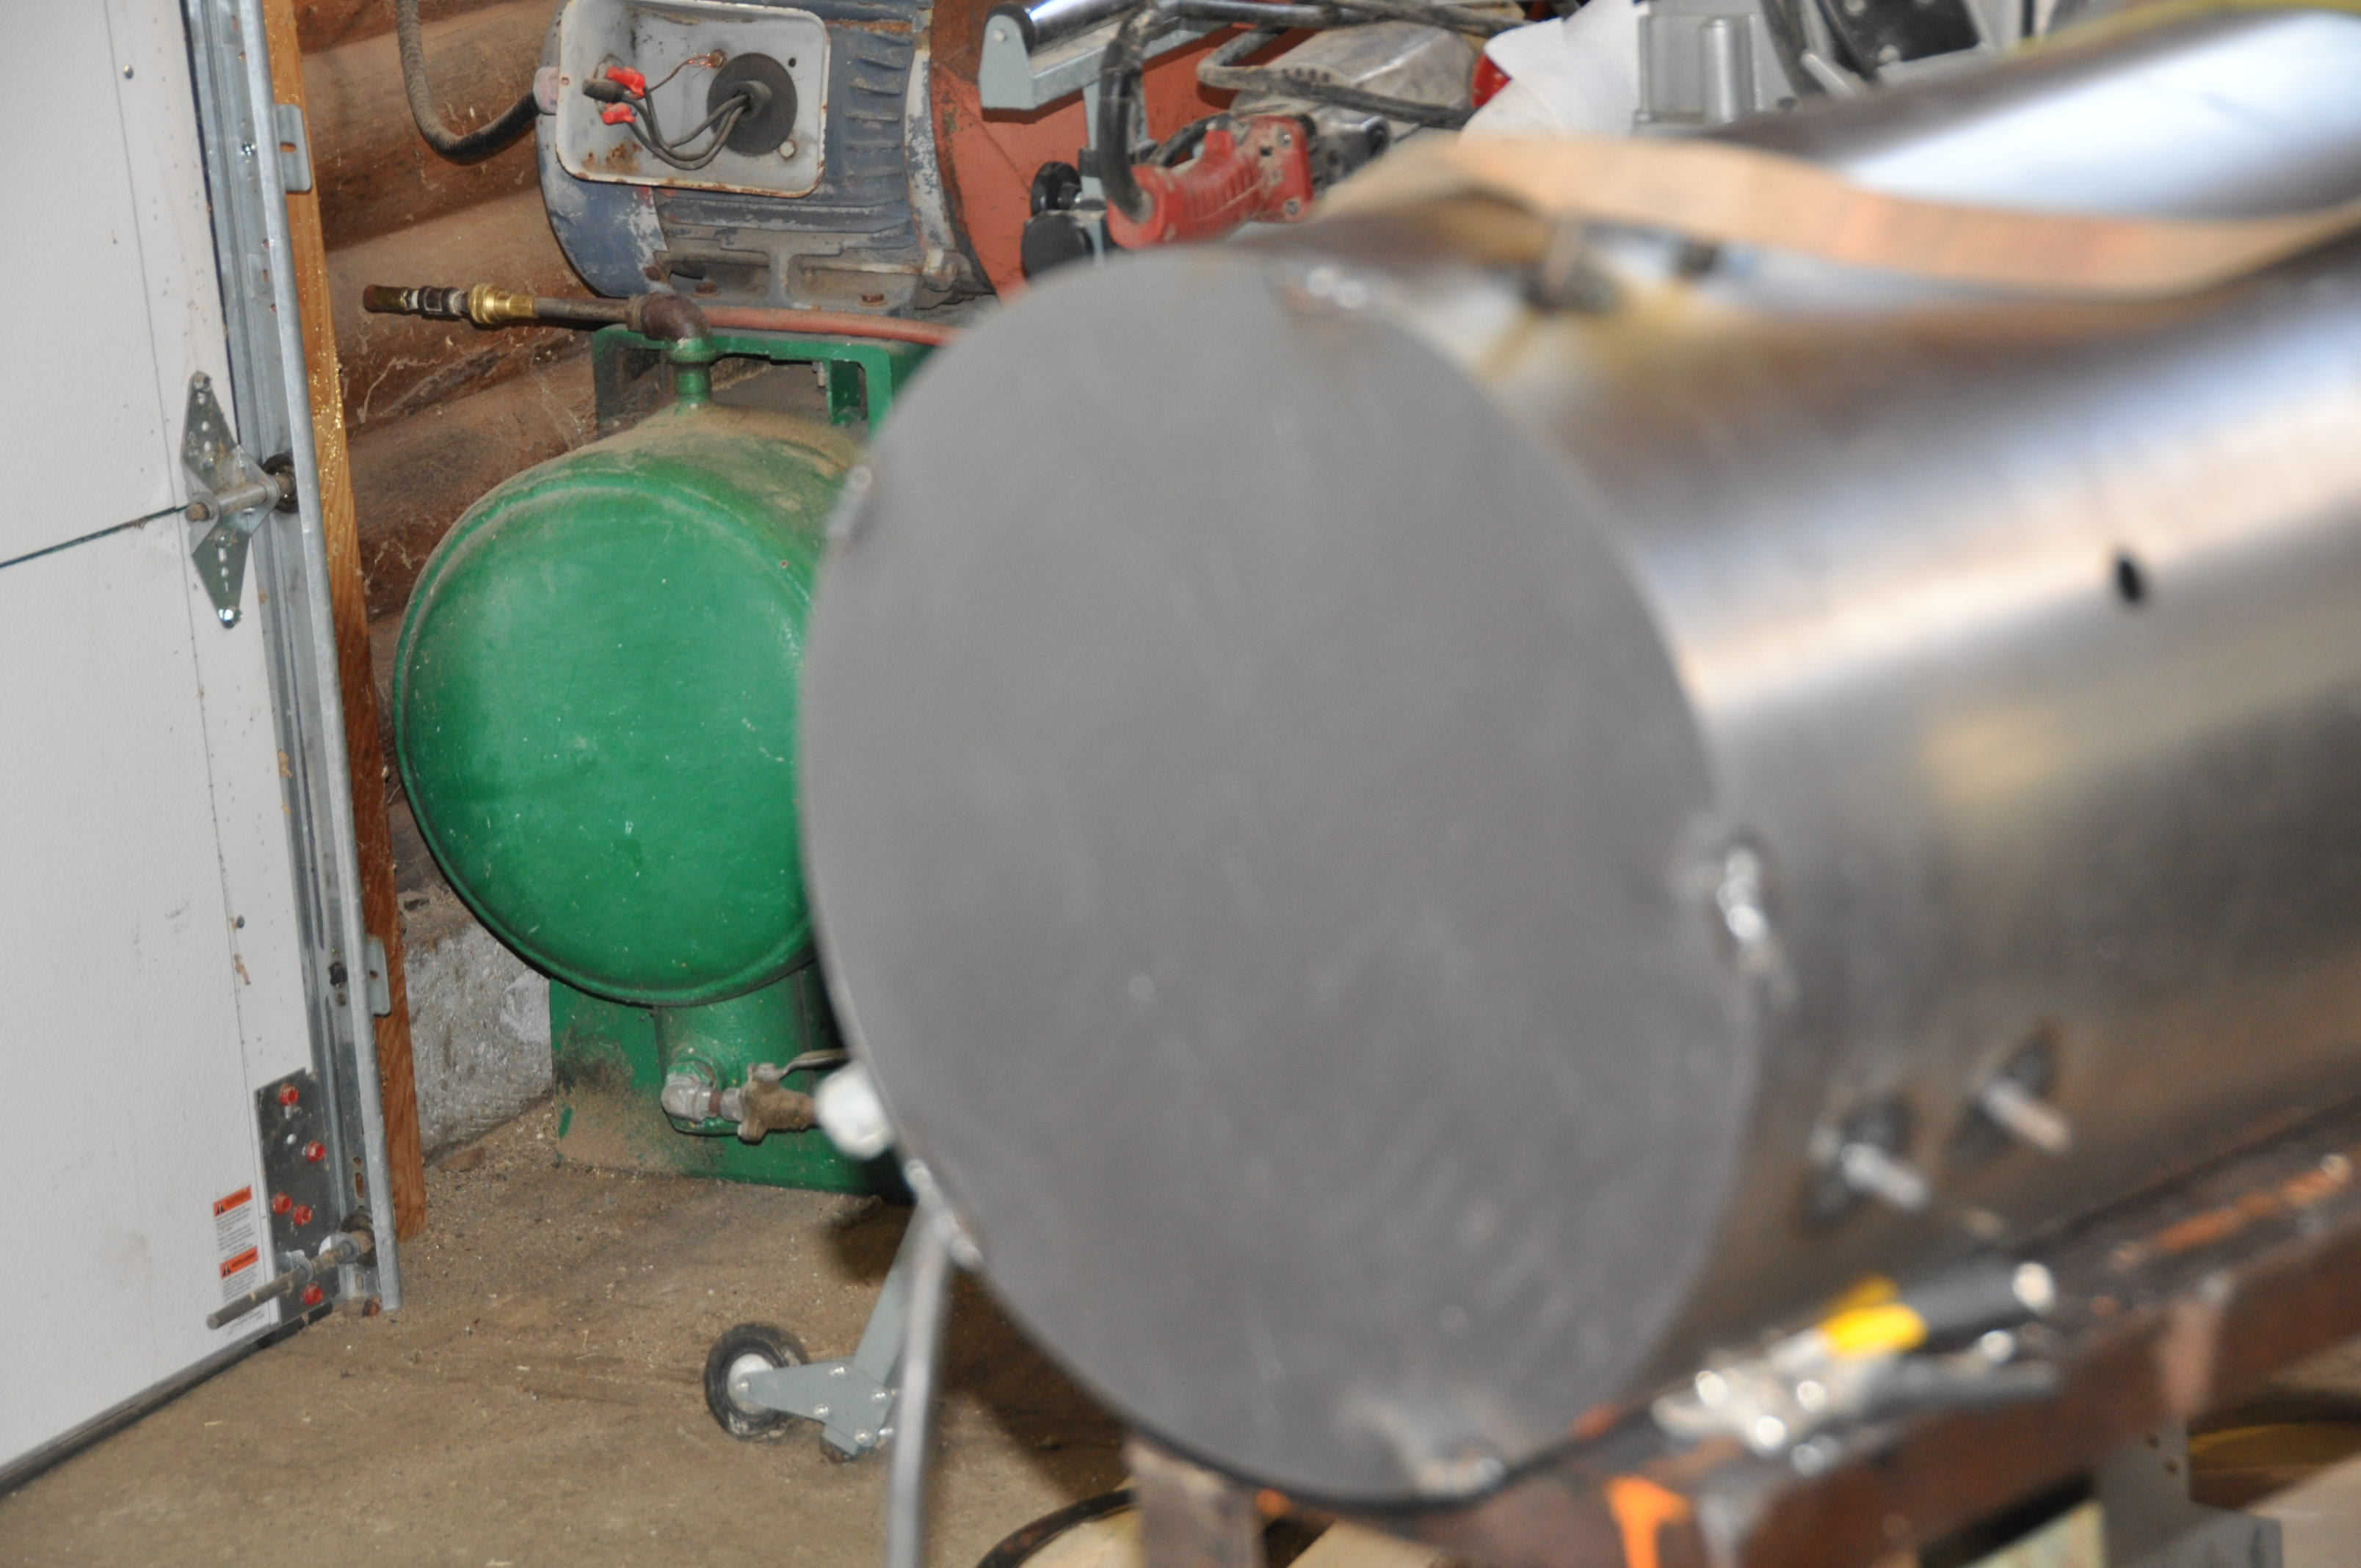
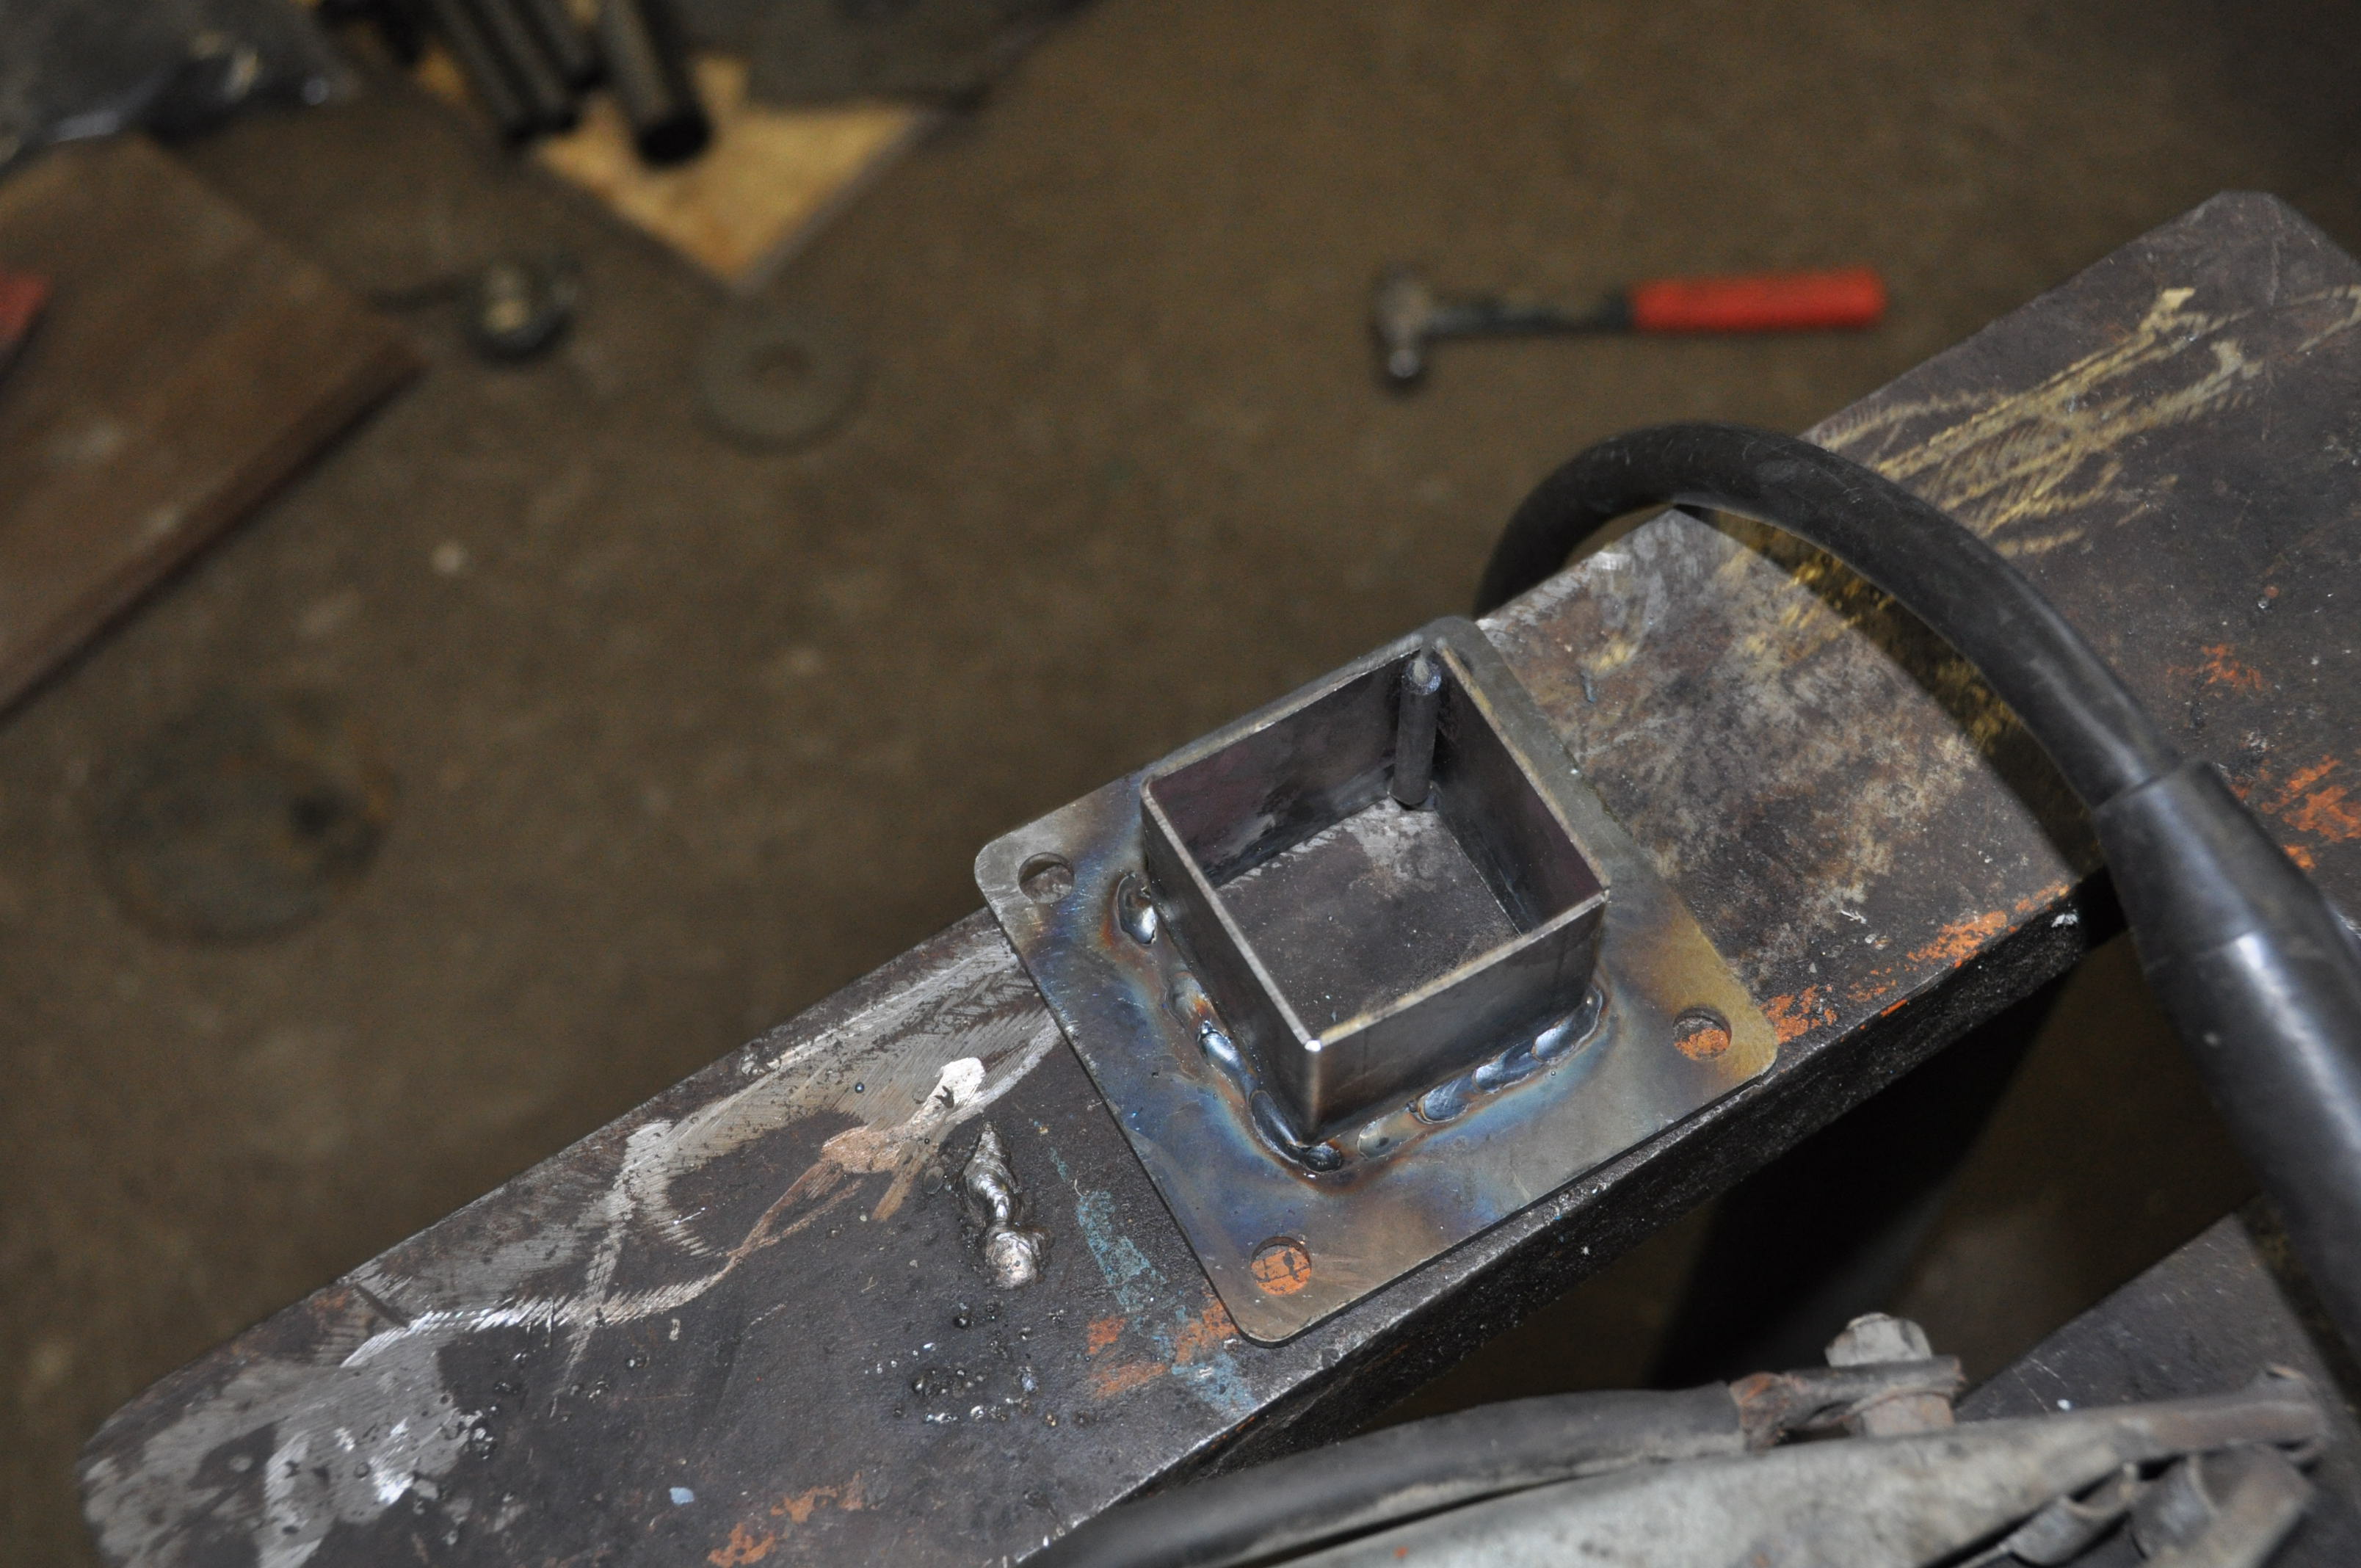
 I started by welding the studs for the 4 support legs of the gasifier into the holes provided in the cowling. This job was pretty simple … although a little challenging to weld inside the cowling. You may notice that one of the welds in the picture to the left goes off track … I discovered that my auto-darkening helmet can be adjusted based on the amperage being drawn by the welder. Less amps means you can reduce the darkness level. Until I figured that one out I could barely see anything but the arc while I was welding … it made it hard to stay on track! I am now very happy with the automatic helmet, I was getting ready to go back to the old helmet I was used to up to that point.
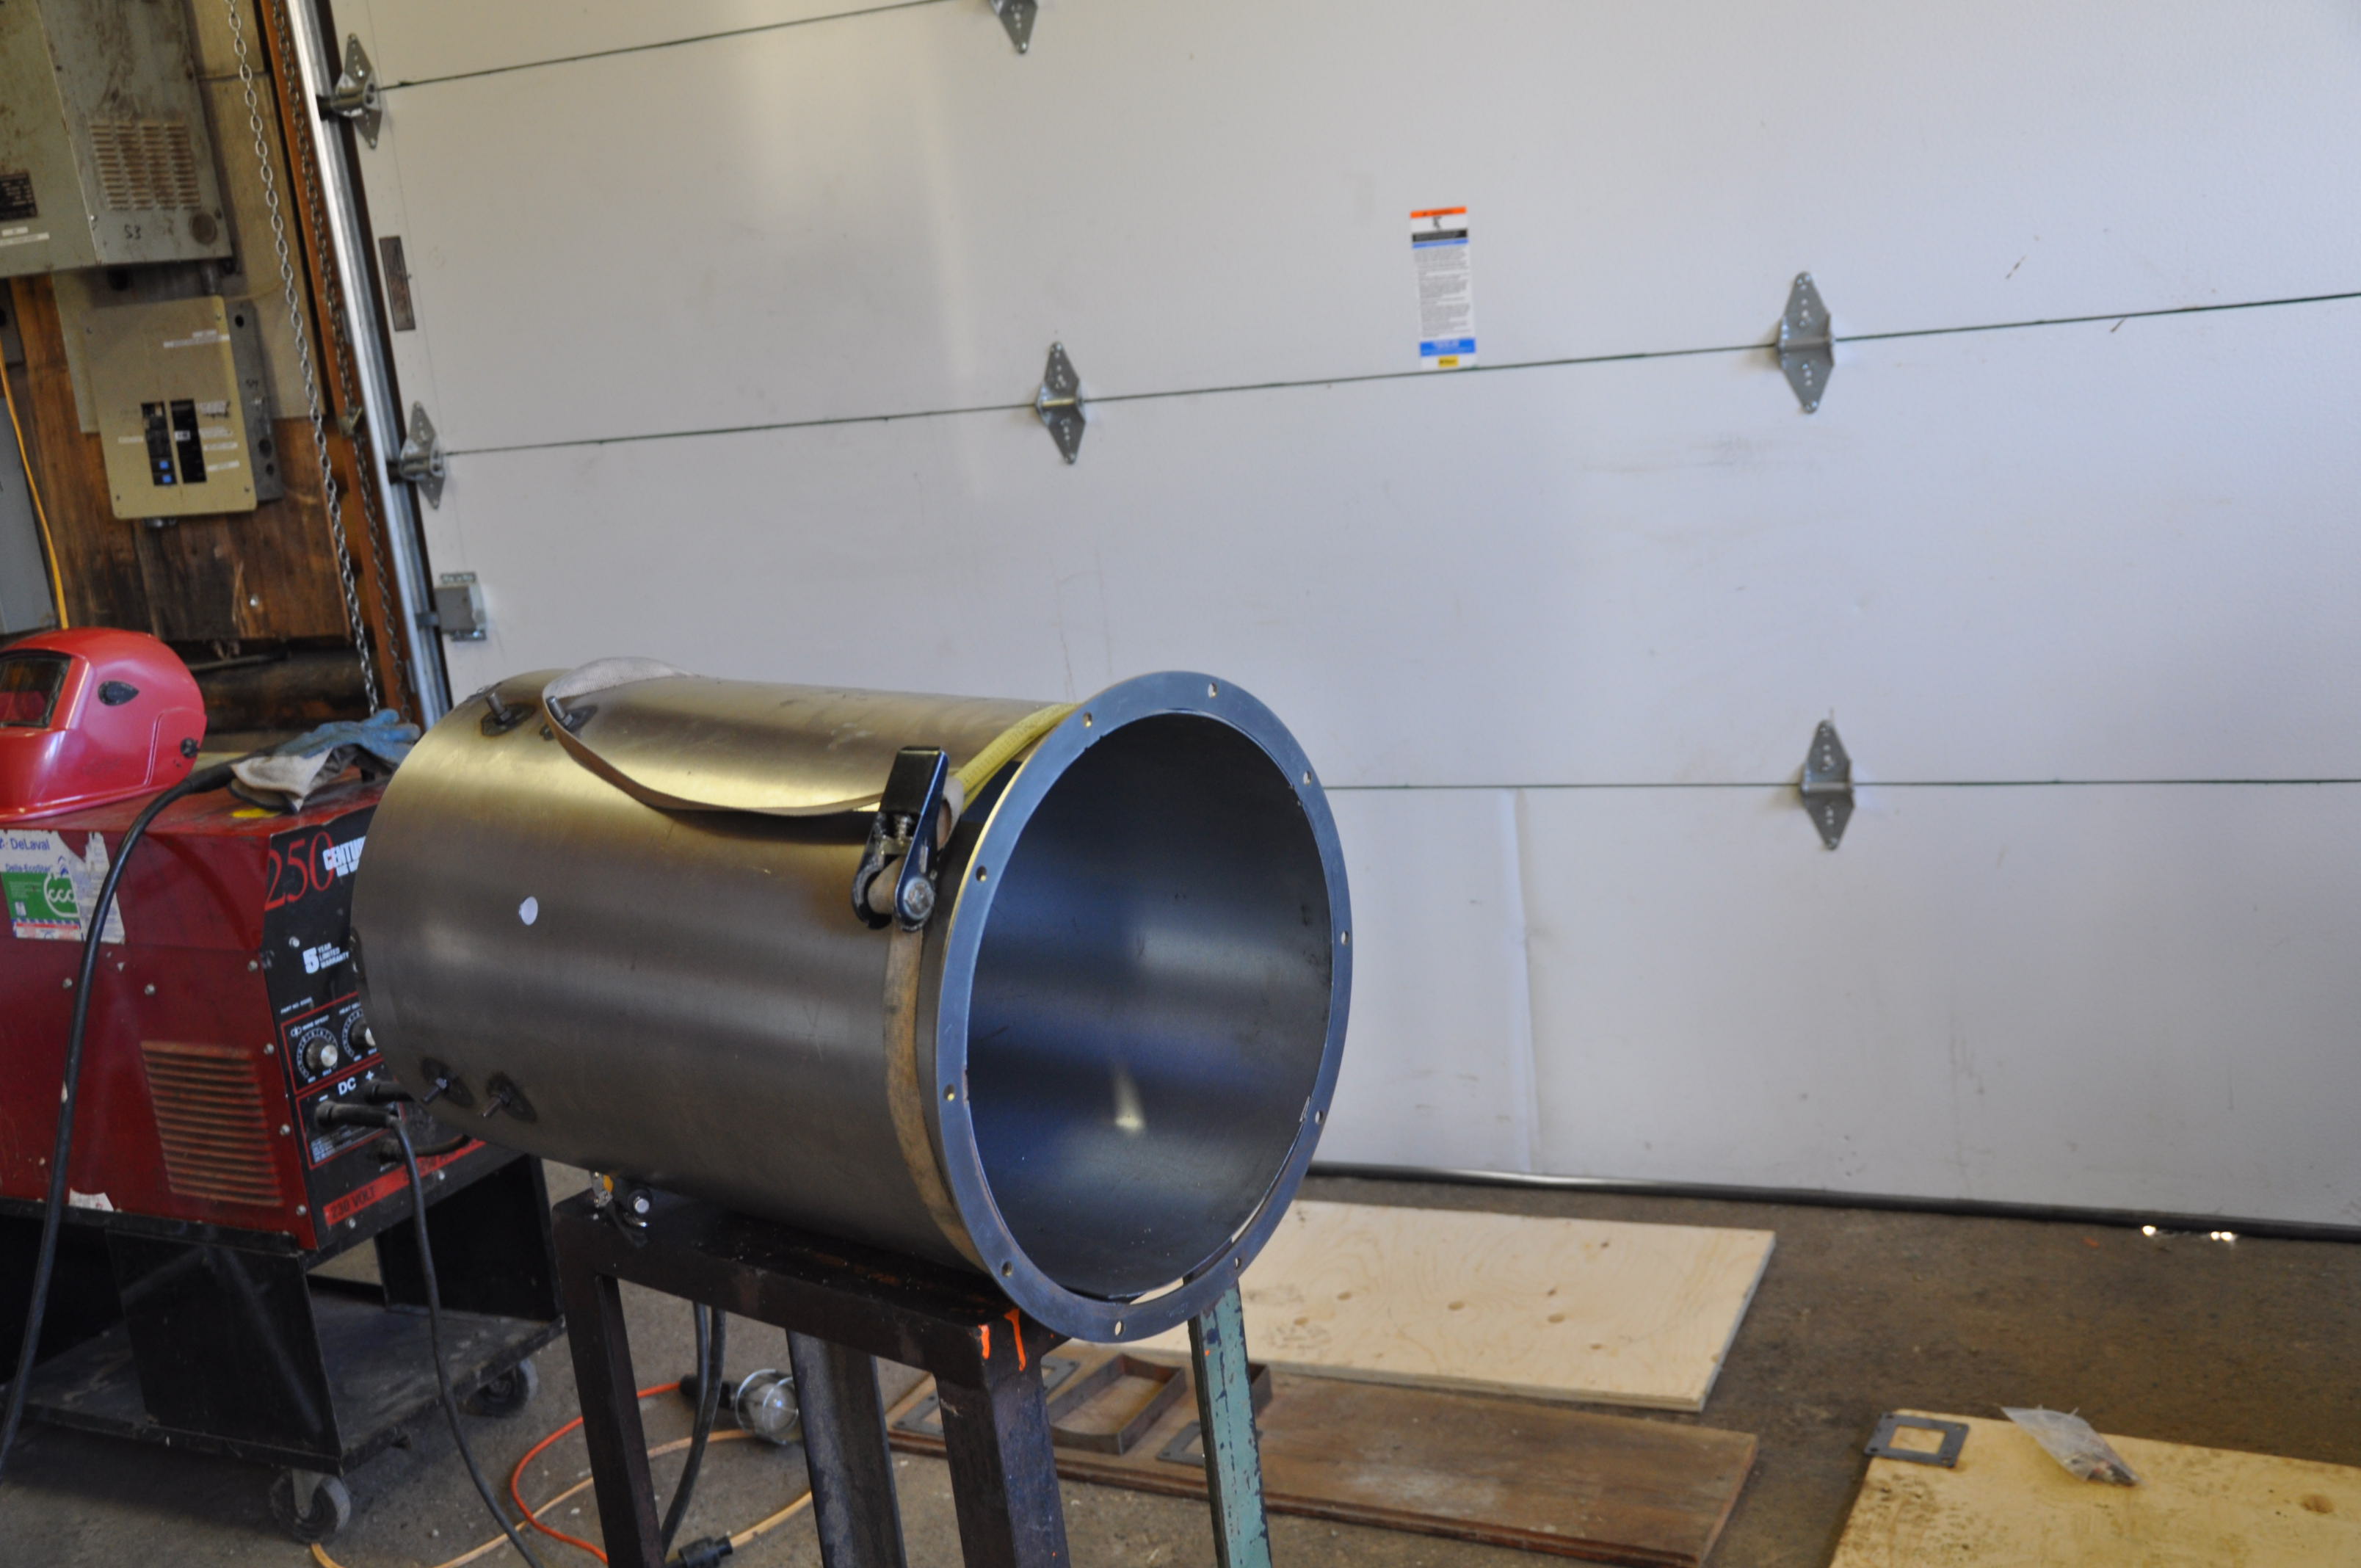
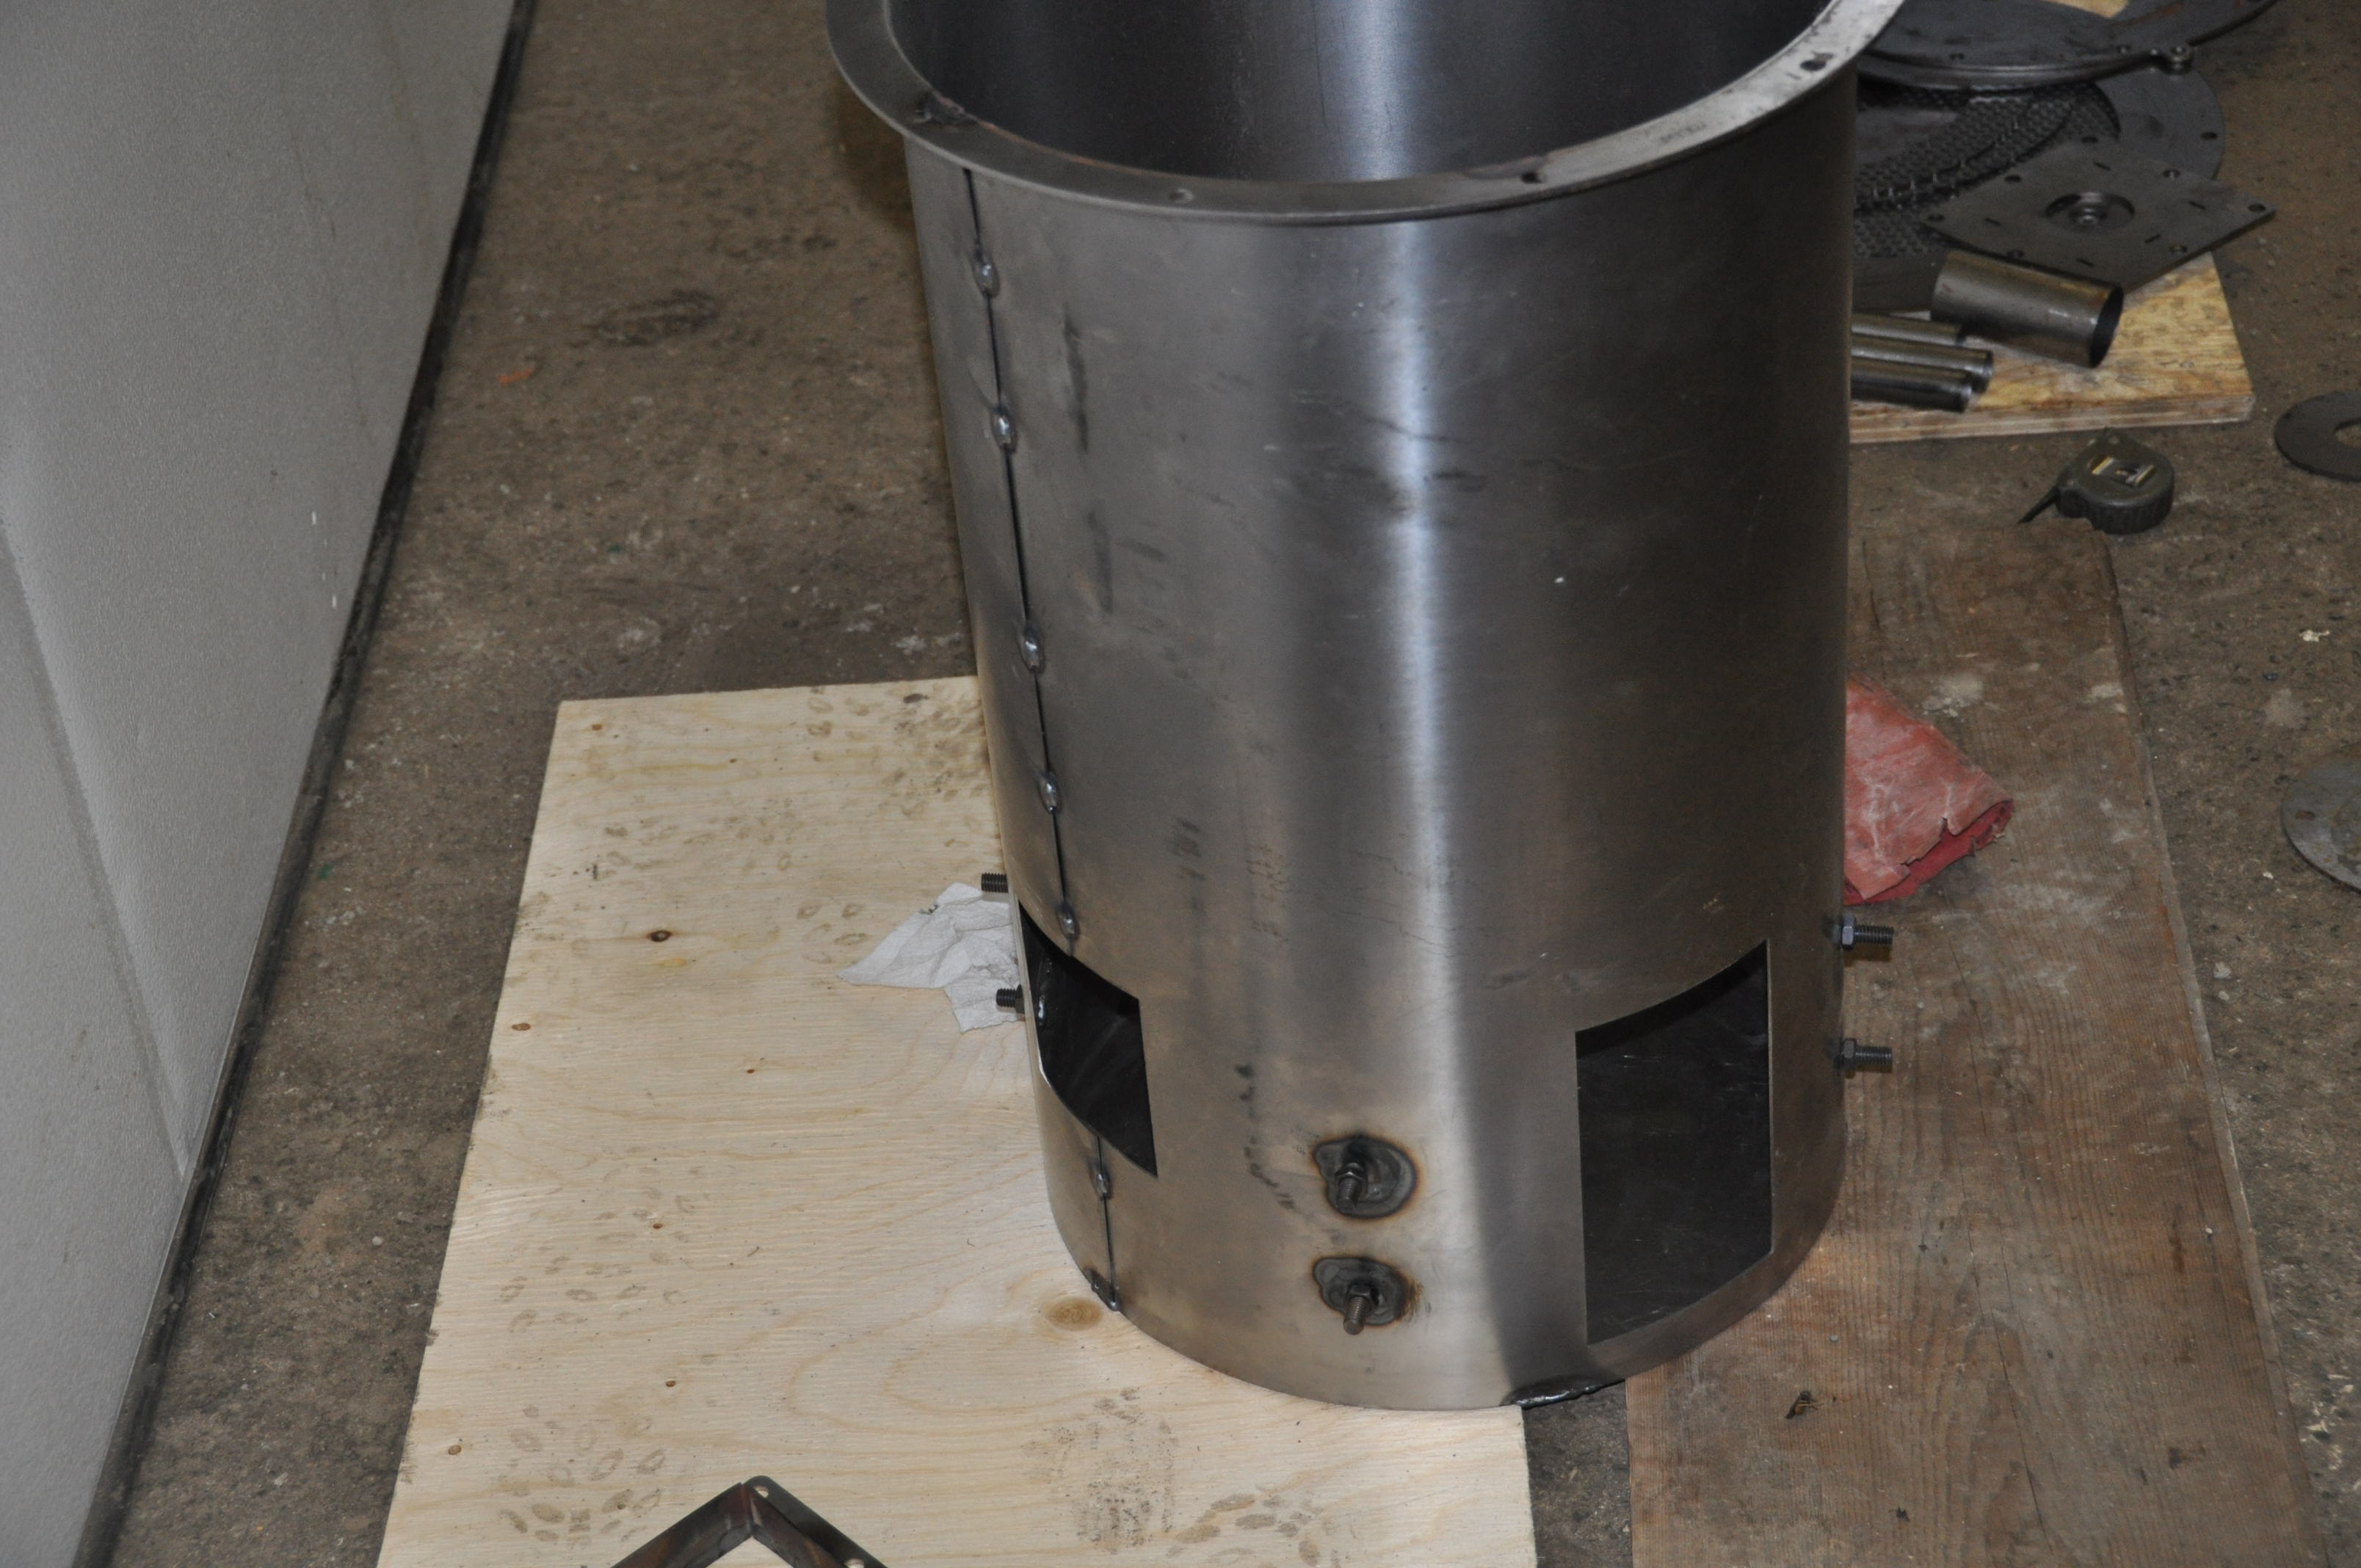
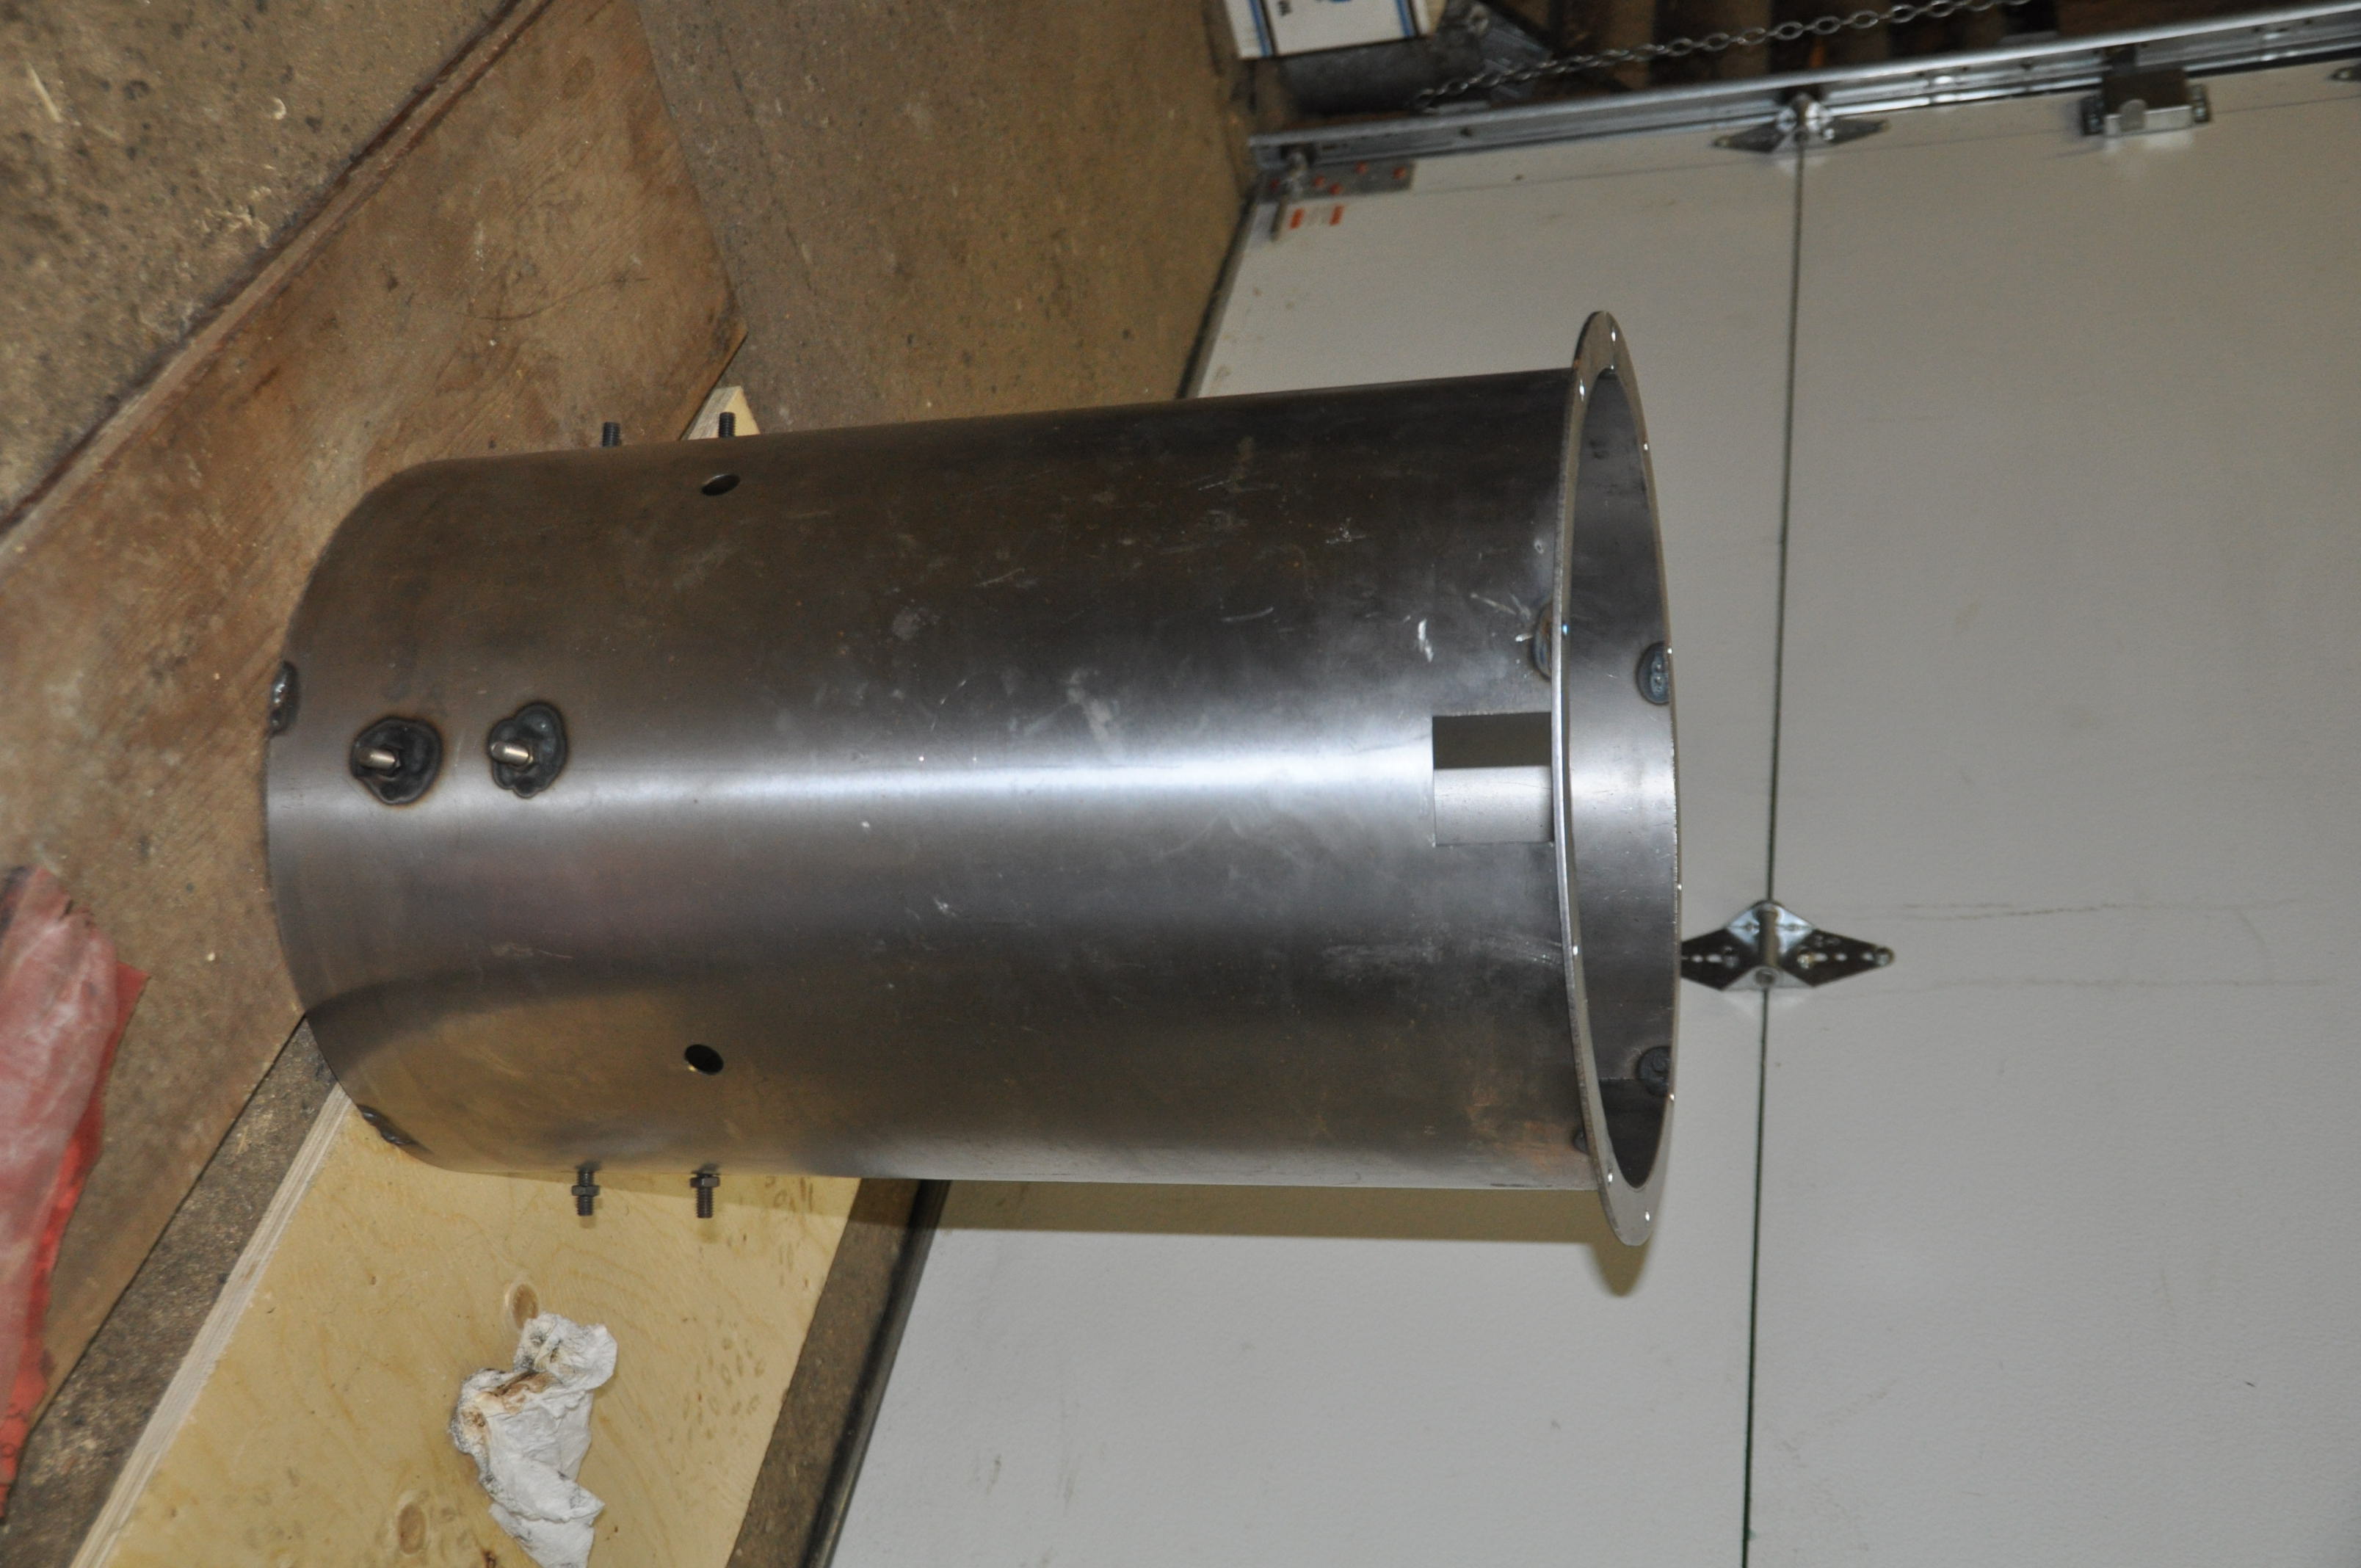
 I then fitted and tack welded the bottom plate of the cowling. The hardest part of this job wasfitting the plate, after every weld I would re-adjust the clamp to make sure there were no gaps between the wall and plate. After the bottom plate was tacked I then tack welded the top flange … again I adjusted the clamps after every tack to take the gaps out between the wall and flange. I then tack welded the seam of the cowling. I clamped the seam together as I tacked to keep the seam tight.
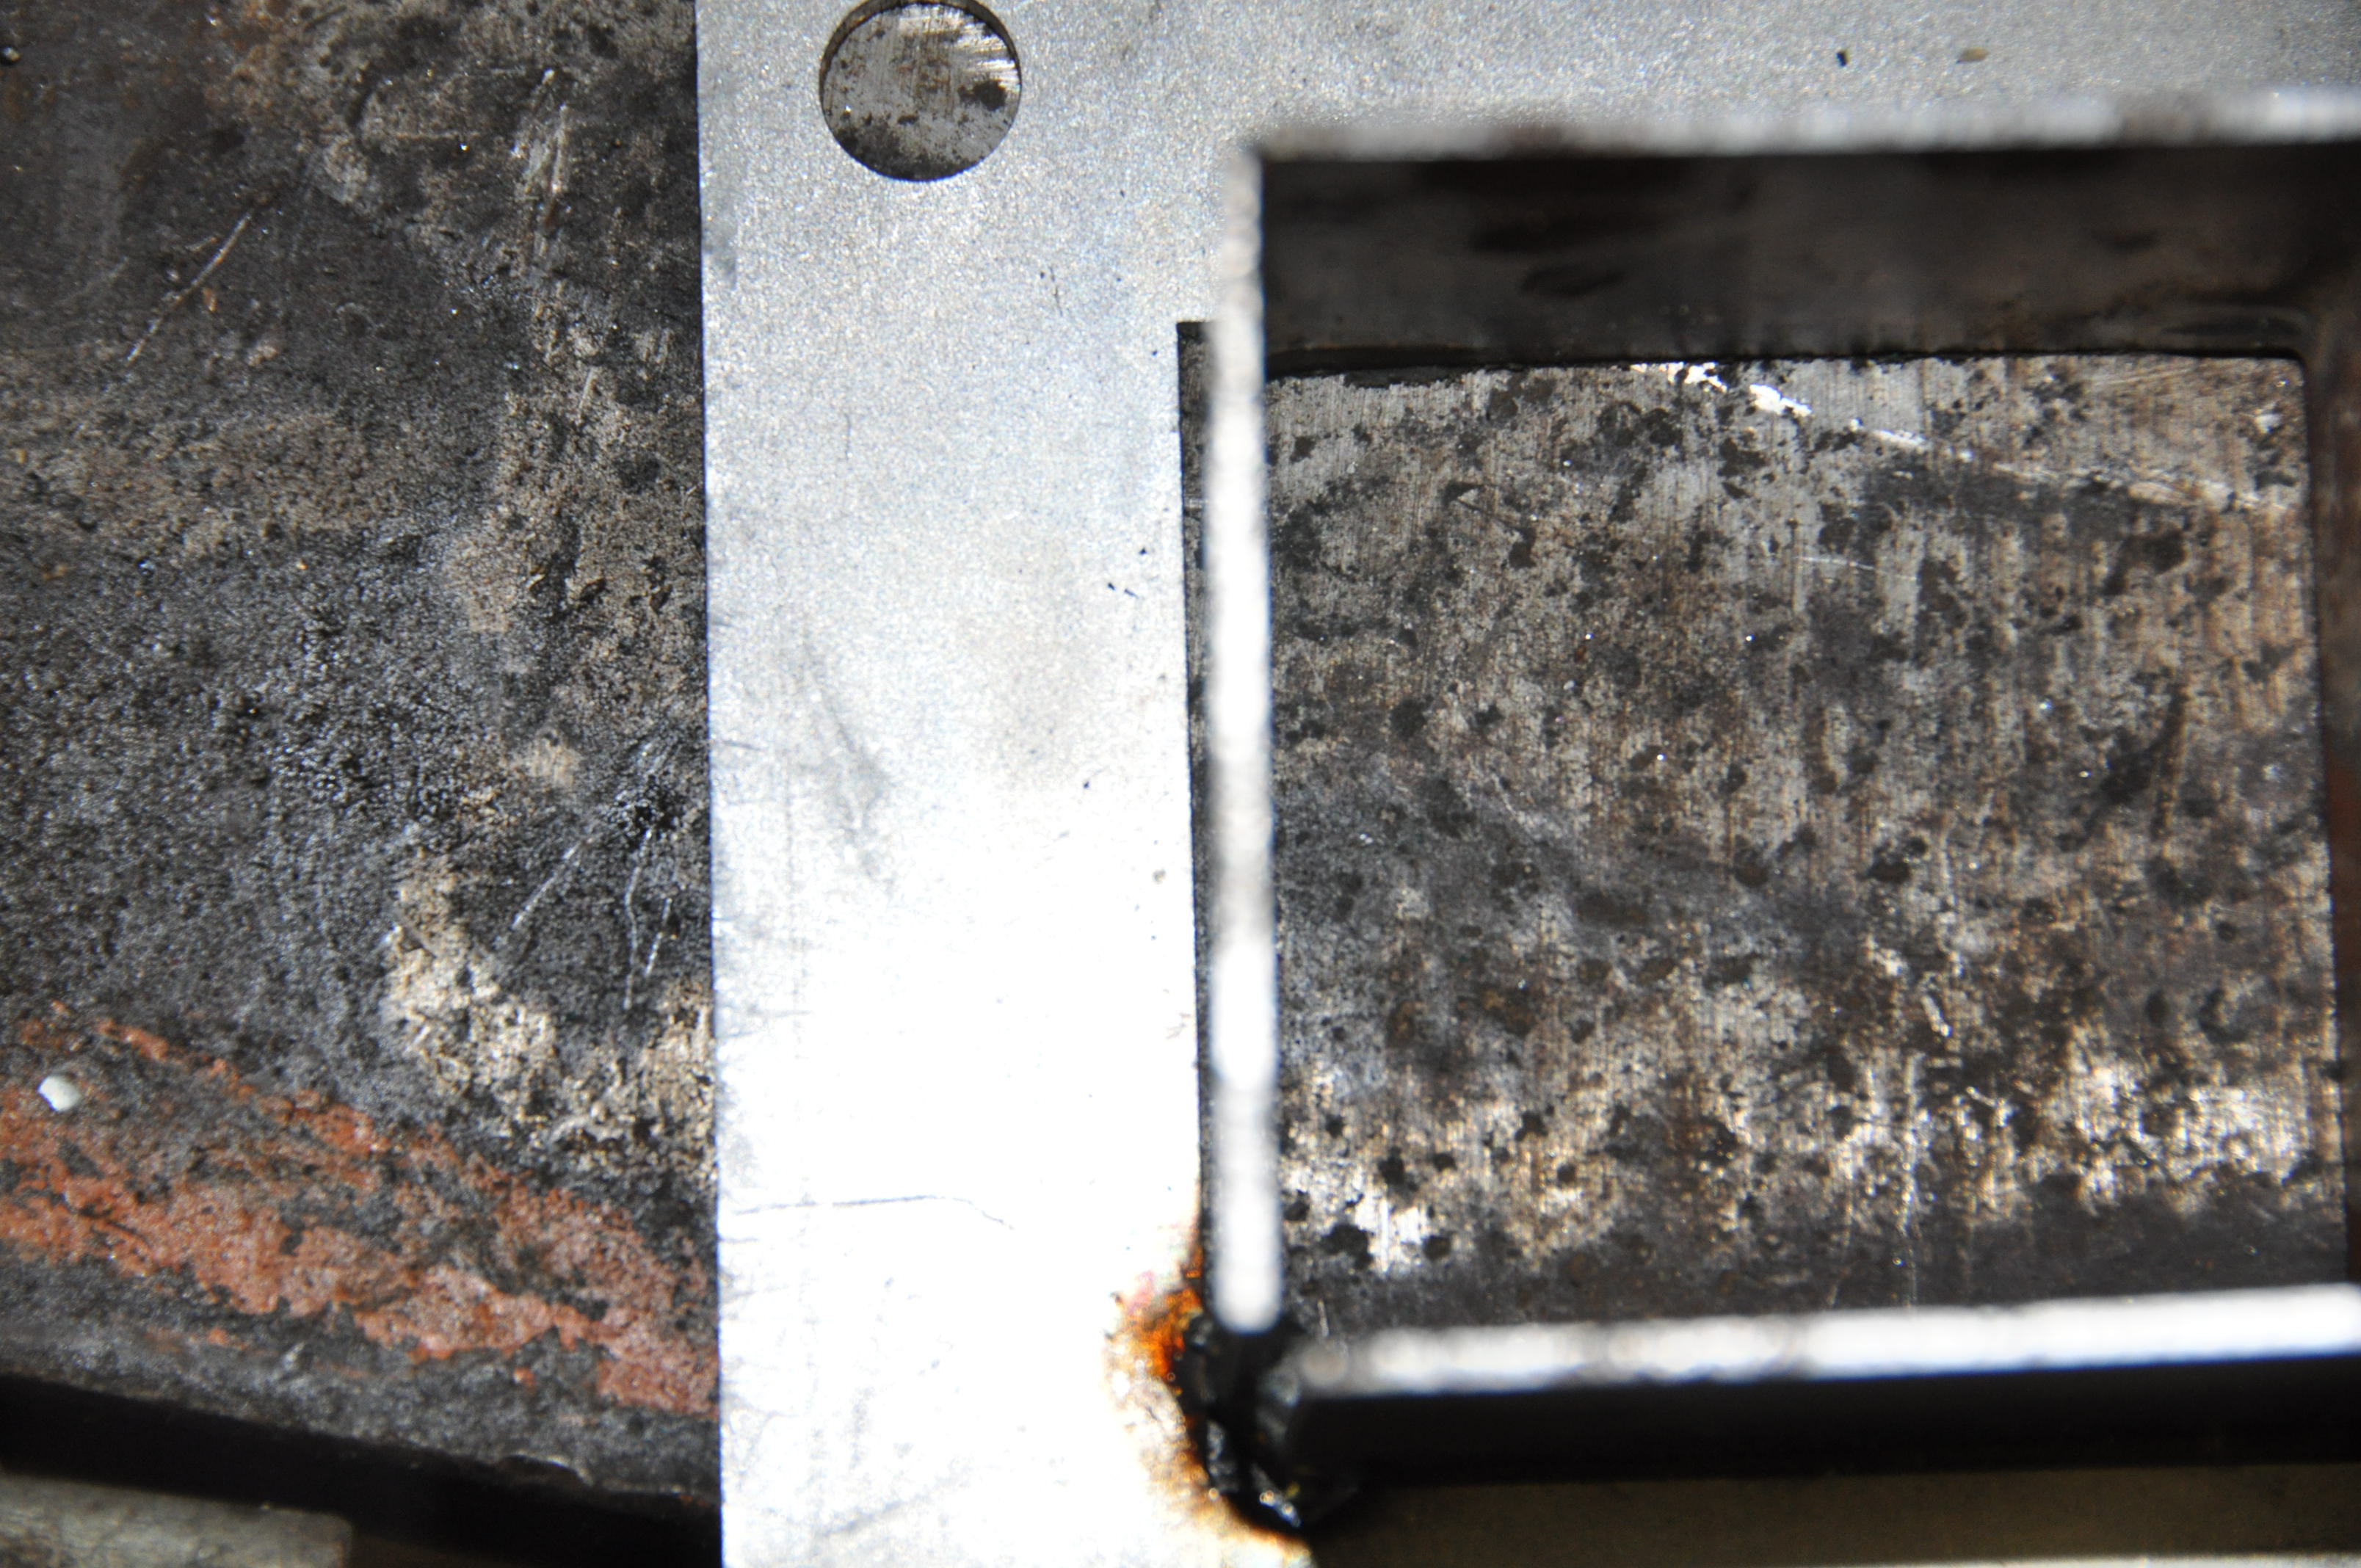
 I then welded the ash port, gas out and a third unidentified (see later) assembly; each assembly consists of a hanger and plate. Welding these assemblies together was straight forward, but I did have
 problems with the gas out assembly. The hanger for this assembly was too small for its intended cut out in the plate, leaving an air gap between the plate and the hanger along two sides and along the seam of the hanger. I had trouble welding the seam of the hanger due to the large gap … I was just blowing out the steel. I solved this problem by welding a 1/4″ round filler piece inside the seam. I am guessing there is a more elegant solution, but this worked for my skill level! I am also assuming that this filler will not be a problem for gas flow down the road.
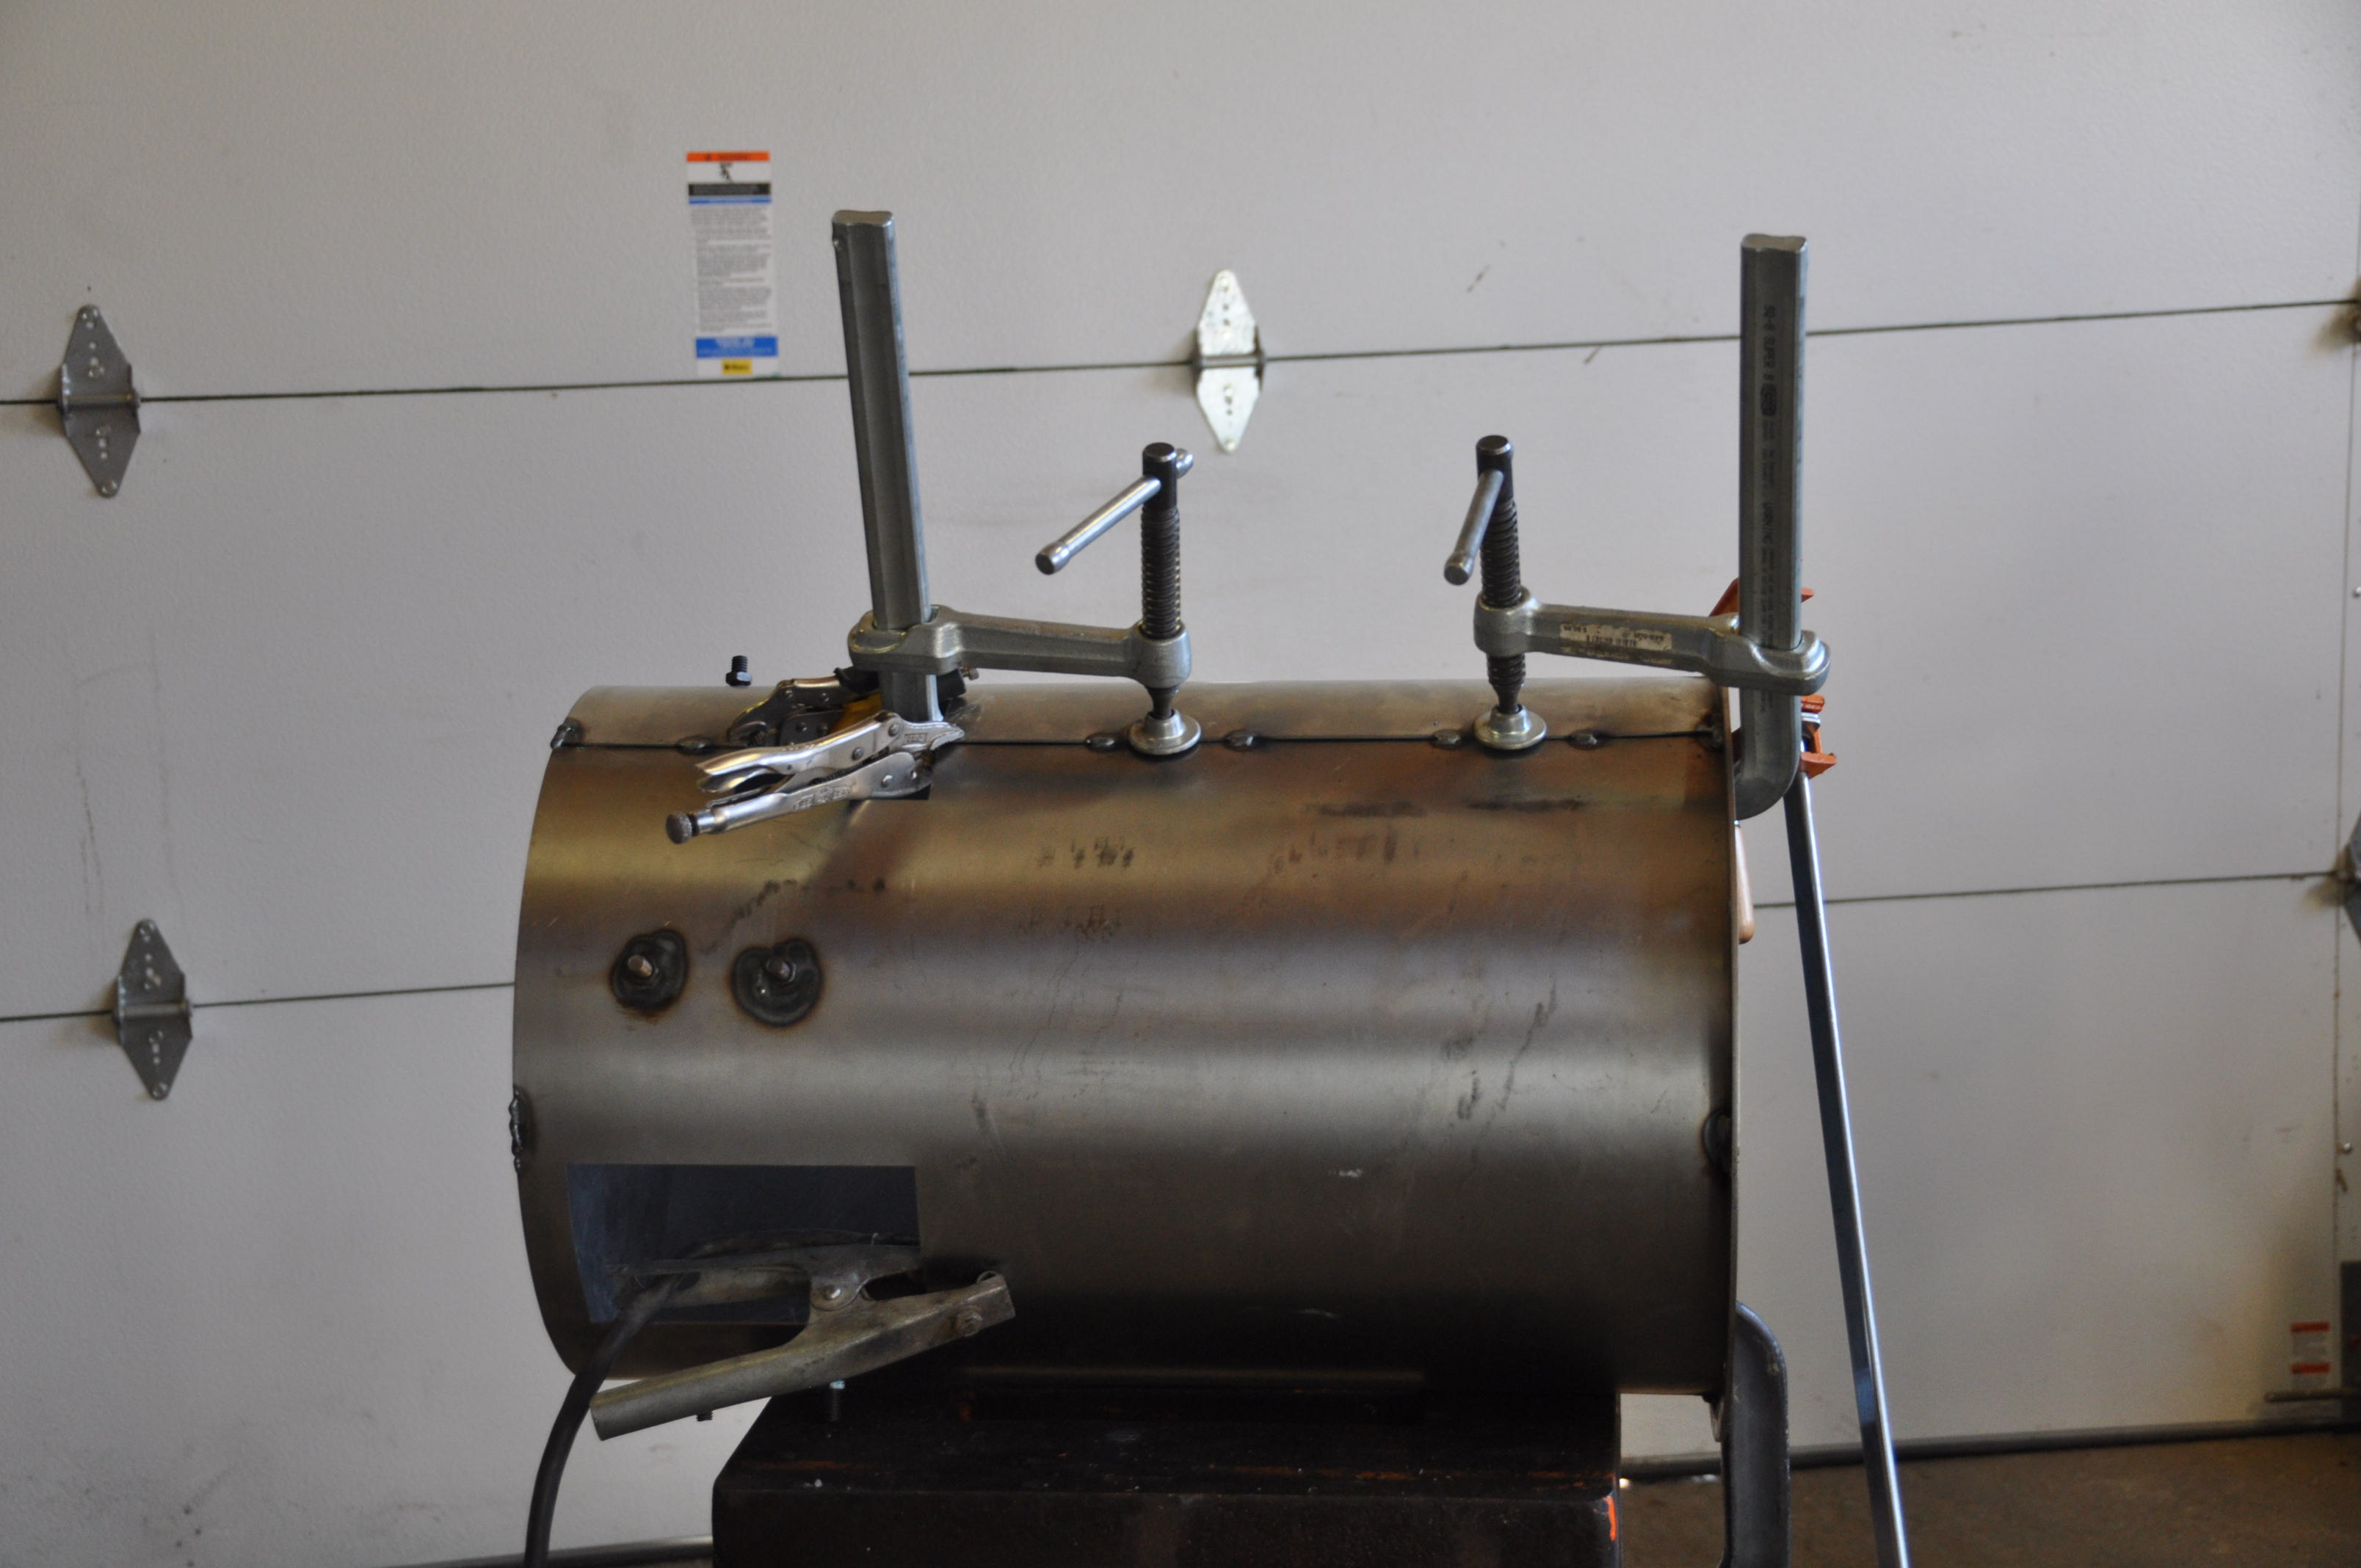
At this point I am a little stuck on how to proceed as the video does not exactly match my parts. I am wondering about the following:
- The gas cowling wall piece does not have a large diameter hole for a 1.5″ weld coupler. It does have a larger square cut out that fits the third unidentified assembly I welded above. I am assuming that this square assembly is a replacement for the weld coupler.
- The gas out assembly does not have a hole drilled in its hanger piece as is shown in the video. I think this is fine as the assembly instructions for the v4.3 GEK mention that the bung has been moved from the gas out assembly.
- There are two 3/4″ diameter holes that have not been dealt with in the gas cowling.


Chris, We were happy to meet you and your family during your cross country trip. Thanks for posting about the GEK III gasifier and your experience building it. We look forward to seeing you at the upcoming workshop. We’ve got nearly 70 people coming in from all over the world! Your recent experience will help those interested in welding up a kit during our workshop. You will be welcomed with open arms by the APL crew that met you while in Berkeley- and meet Jay too! See you in next weekend.
chris,
i just found your update about progress. great you are making this happen. please keep in contact with us if you need any help. i’ve been watching your earthship project for a couple years and it seems likely you are going to do something interesting with the gasifier. if you need any help, please find me at gek@allpowerlabs.org.
thank you for doing the good work.
jim
Julia Hasty from All Power Labs addressed the questions I raised in an email … here is the relevant info …
Chris,
For your questions below:
1. The 1.5 weld coupler went away but was not replaced by the smaller second square port in function.
Refer to the assembly instructions section IV. Reactior, section I Ash Port and Grate Shake Port from the link here: http://wiki.gekgasifier.com/w/page/27905807/Assembly%20Instructions%20for%20the%20GEK%20v4%20Kit
You will want to scan through these assembly instructions first for these wil point out some of the subtle version changes that we dont quite have updated in our welding videos quite yet.
2.Yes, you are correct- you have the latest and greatest version that happens to have this small difference as well.
3. Yes you are correct in your assumption here as well. You will want to use a 1/2” halved weld coupler at these ports.
…
Thanks Julia!
Can’t tell you how disappointed we were when the van cacked on Chris. He was so looking forward to coming down and seeing everybody and meeting like-minded people, since I (his wife) kind of take his alternative thinking for granted these days. Our son was going to accompany him, but if you are having another workshop in the next 6-9 months, I think I may come down with him. I loved Berkeley and while I may hang around and geek out with all of you for a bit, I’d probably do some exploring in your lovely neck of the woods.